
What is the zone system in photography
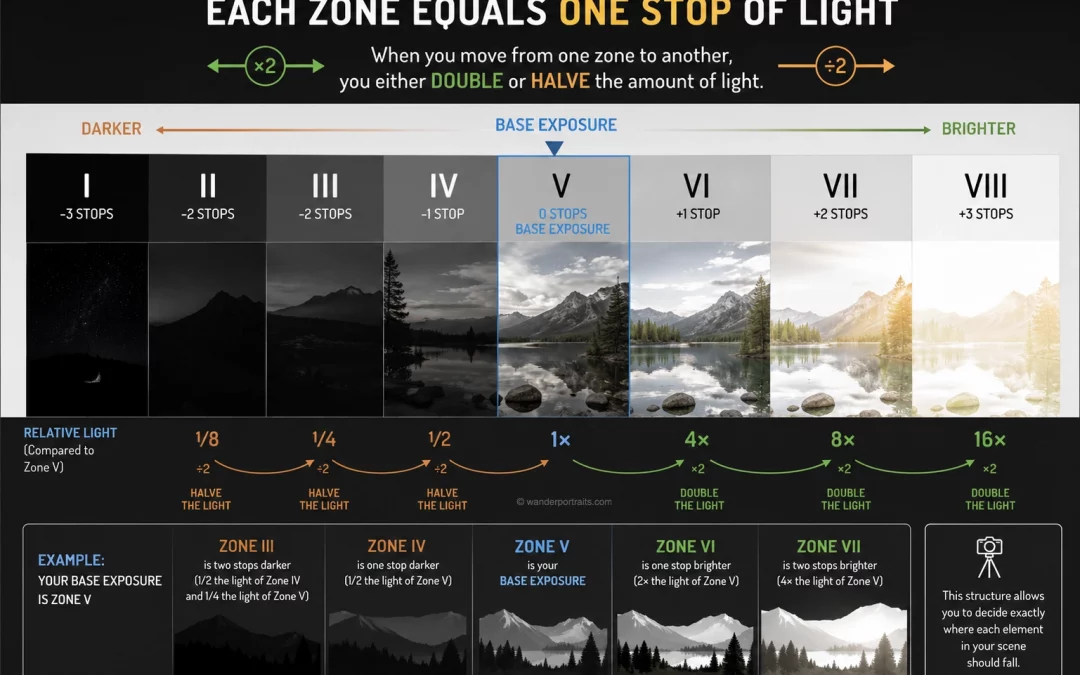
The zone system in photography helps you control exposure by dividing light into clear tonal steps. Each zone represents a different brightness level, from pure black to pure white.
The system was developed by Ansel Adams and Fred Archer to give photographers full control over how tones appear in an image.
Zone V represents middle gray. Your camera meter always aims to place whatever you measure into this zone. From there, you can adjust exposure to move tones brighter or darker.
Understanding zones and exposure
Each zone equals one stop of light. When you move from one zone to another, you either double or halve the amount of light.
For example:
- Zone V is your base exposure
- Zone VI is one stop brighter
- Zone VII is two stops brighter
- Zone IV is one stop darker
- Zone III is two stops darker
This structure allows you to decide exactly where each element in your scene should fall.
Why light multiplies and divides
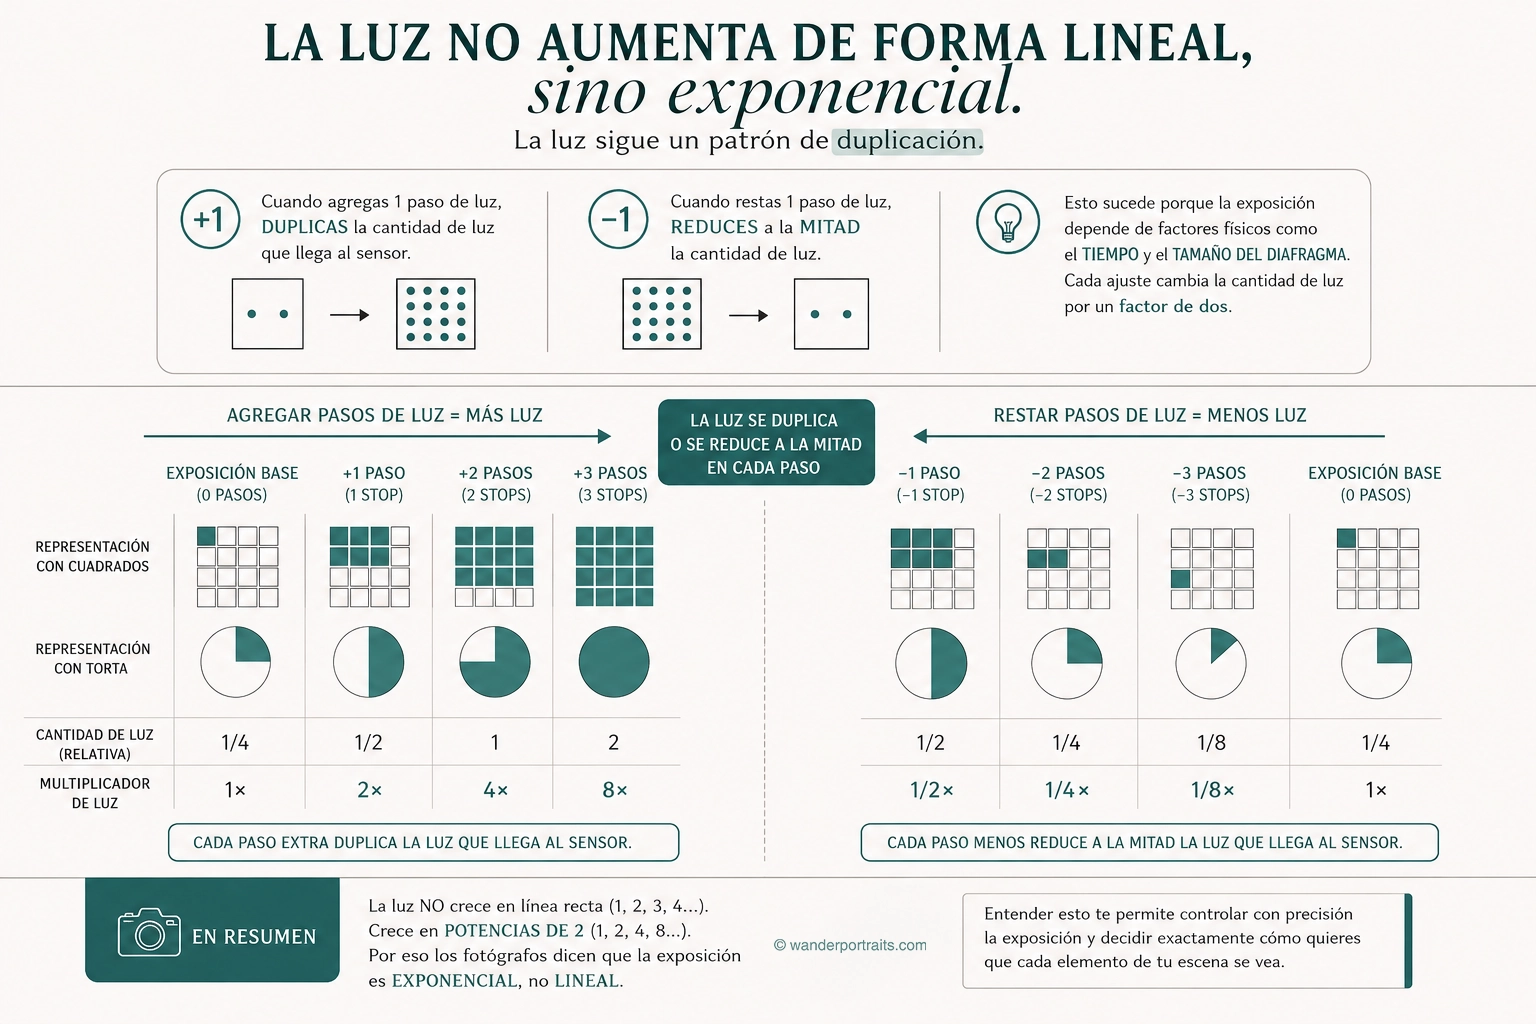
Light does not increase in a linear way. Instead, it follows a doubling pattern.
When you add one stop of light, you double the amount of light reaching the sensor. When you subtract one stop, you cut the light in half.
This happens because exposure depends on physical factors like time and aperture size. Each adjustment changes the amount of light by a factor of two.
For example:
- +1 stop = 2× more light
- +2 stops = 4× more light
- +3 stops = 8× more light
And in reverse:
- −1 stop = 1/2 light
- −2 stops = 1/4 light
- −3 stops = 1/8 light
This is why photographers say that exposure is exponential, not linear.
How to apply the zone system in real situations
Start by measuring the most important part of your scene. Your camera will place that reading in Zone V.
If you want that area to appear darker, reduce exposure. If you want it brighter, increase exposure.
For example, if you photograph light skin, you usually place it in Zone VI. That means you add one stop of light from the meter reading.
If you photograph deep shadows with detail, you place them in Zone III. That means you reduce exposure by two stops.
This method gives you precise control over the final look of your image.
How this applies to shutter speed and ISO
The same logic applies to shutter speed and ISO.
With shutter speed:
- Slower speed lets in more light
- Faster speed reduces light
Each step doubles or halves the light.
With ISO:
- Increasing ISO doubles sensitivity
- Decreasing ISO halves sensitivity
All exposure settings follow the same rule. One stop always equals a change by a factor of two.
Why this concept still matters in digital photography
Even in digital photography, the zone system remains relevant. Instead of looking at negatives, you read the histogram.
The left side represents shadows. The center shows midtones. The right side shows highlights.
By understanding zones and light behavior, you can place tones exactly where you want them and avoid losing detail.
Mastering how light multiplies and divides allows you to control contrast, preserve texture, and create more intentional images.
Stay creative!
Gi.